HP 6125XLG Blade Switch IRF Setup
- 3 minsHP (Hewlett-Packard) switches support a feature called Intelligent Resilient Framework (IRF), which is designed to provide high availability and scalability for network infrastructure. IRF allows multiple HP switches to be interconnected and managed as a single logical entity (Similar to Cisco vPC), enabling simplified network management, enhanced reliability, and improved performance.
Prerequisite
- HP c7000 Blade Center with two 6125XLG blade switches.
Logical diagram
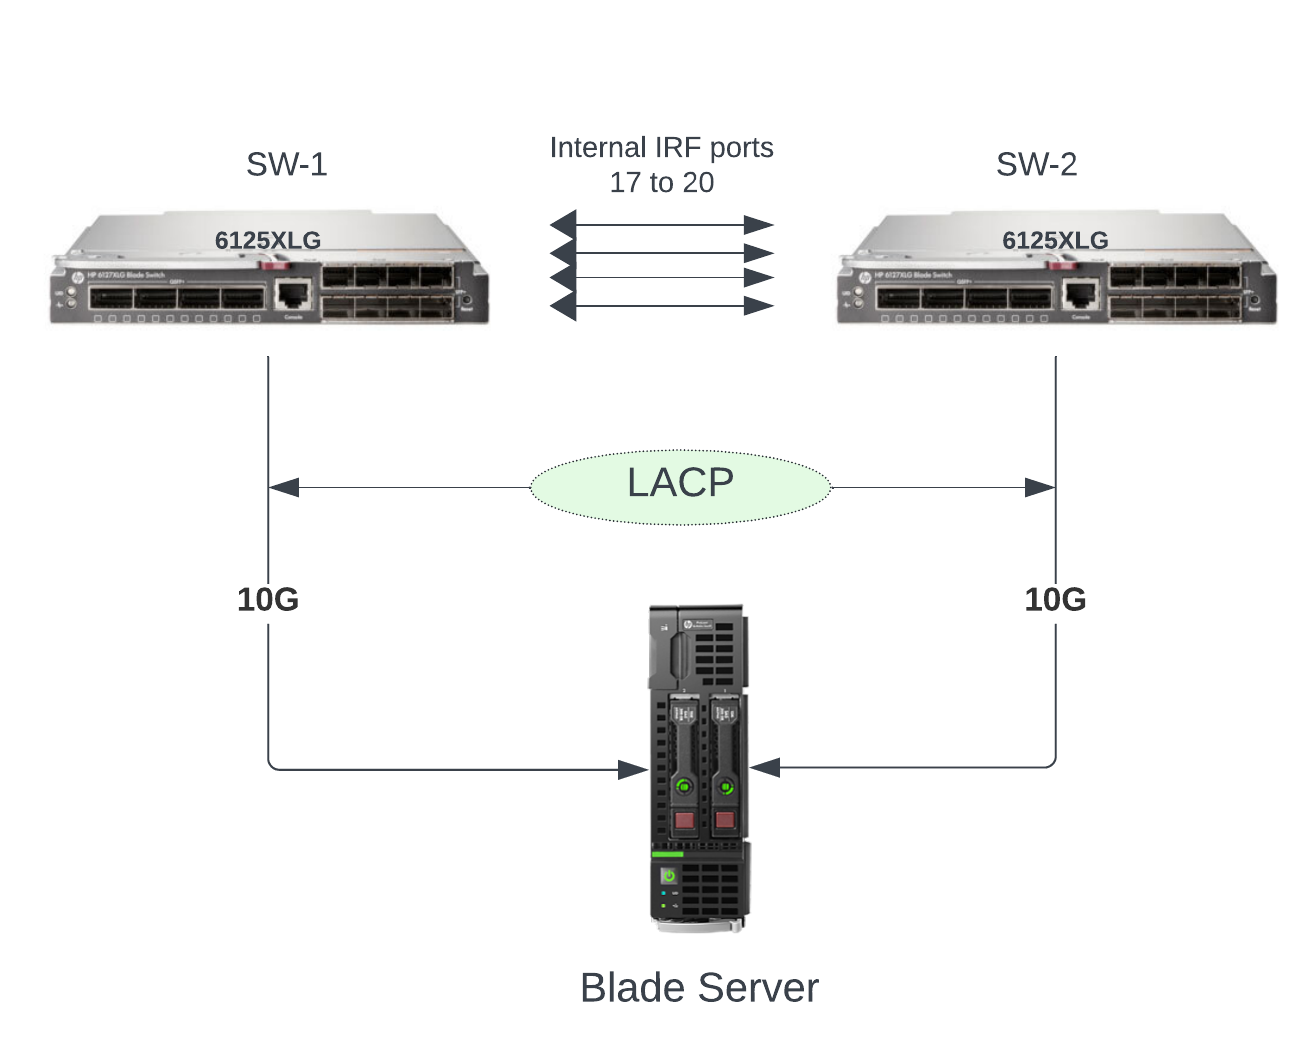
Firmware version
Make sure both switches running same version and if not then use following command to upload image using tftp.
<sw-1> tftp 10.0.8.8 get 6125XLG-CMW710-R2432P06.ipe
Run following command to load firmware (slot number can be different in your case)
<sw-1> boot-loader file flash:/6125XLG-CMW710-R2432P06.ipe slot 1 main
<sw-1> reboot
Configure SW-1
Set MemberID
Check member ID and make sure both switch has different ID (I am going to give memberID 1 to SW-1 so easy to identify)
<sw-1> display irf
MemberID    Role    Priority  CPU-Mac         Description
 *+1        Master  1         00e0-fc0f-8c02  ---
--------------------------------------------------
NOTES: To change MemberID use this command “irf member 2 renumber 1”
Set Priority
By default, the priority of a member switch is 1. The greater the priority value, the higher the priority. A member with a higher priority is more likely to be the master, and more likely to preserve its ID in a member ID collision.
<sw-1> system-view
[sw-1] irf member 1 priority 32
Assign Interfaces to logical IRF port
Port 17 to 20 are internal IRF ports connected to back to back with both switch using c7000 chassis backplane. We will assign them to IRF logical port.
Shutdown ports before assign them to IRF
[sw-1] irf-port 1/1
 	port group interface Ten-GigabitEthernet1/0/17
	port group interface Ten-GigabitEthernet1/0/18
 	port group interface Ten-GigabitEthernet1/0/19
	port group interface Ten-GigabitEthernet1/0/20
[sw-1] interface range Ten-GigabitEthernet1/0/17 to Ten-GigabitEthernet1/0/20
[sw-1] undo shutdown
[sw-1] save force
Activate IRF port
[sw-1] irf-port-configuration active
Configure SW-2
Set MemberID
Make sure MemberID is different. If its same then you can change it with following command. (I would assign it to 2)
<sw-2> irf member 1 renumber 2
<sw-2> reboot
Set Priority
We will use priority 30 to make it slave.
<sw-2> system-view
[sw-2] irf member 2 priority 30
Assign Interfaces to logical IRF port
Assign port 17 to 20 to logical IRF port (If you notice all the ports start with 2/X/X because we assigned MemberID 2)
[sw-2] irf-port 2/2
 	port group interface Ten-GigabitEthernet2/0/17
	port group interface Ten-GigabitEthernet2/0/18
 	port group interface Ten-GigabitEthernet2/0/19
	port group interface Ten-GigabitEthernet2/0/20
[sw-2] interface range Ten-GigabitEthernet2/0/17 to Ten-GigabitEthernet2/0/20
[sw-2] undo shutdown
[sw-2] save force
Activate IRF port
NOTES: Switch will get reboot as soon as you activate IRF port.
[sw-2] irf-port-configuration active
Validation
After reboot you will see following output on master switch (In our case sw-1)
[sw-1] display irf
MemberID    Role    Priority  CPU-Mac         Description
 *+1        Master  32        00e0-fc0f-8c02  ---
   2        Standby 30        00e0-fc0f-8c03  ---
--------------------------------------------------
 * indicates the device is the master.
 + indicates the device through which the user logs in.

 The bridge MAC of the IRF is: d894-03ef-39b5
 Auto upgrade                : yes
 Mac persistent              : 6 min
 Domain ID                   : 0
Now you can’t SSH / Ping sw-2 because it in IRF cluster and you can manage both switch with single IP address. At this point you can configure your server with Active-Active LACP (803.2ad) bond for redendency and high throughput.
Enjoy!